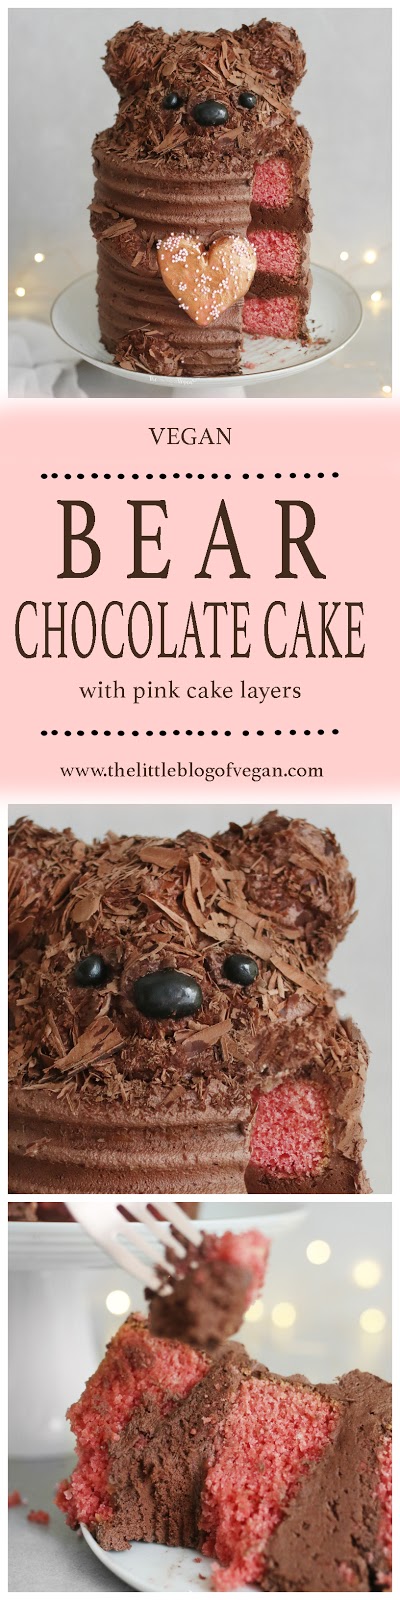
Vegan.I love you ‘Beary’ much.3 layers of pink vanilla cake, with chocolate buttercream, grated dark chocolate and fondant details. Perfect for Valentine’s day. I’m sure whoever you make this cake for, they will love it and be super impressed by your decorating skills…even though its very simple to make- haha! Preparation- 1 hourBaking time- 28-30 minutesServes- Approximately 10-12Level- Medium…Ingredients for the cake-480ml of dairy-free milk -2 teaspoons of apple cider vinegar-420g of self-raising flour-470g of golden caster sugar-1 teaspoon of baking powder-1 teaspoon of bicarbonate of soda-120g of coconut oil (melted)-Pink food gelIngredients for the buttercream -210g of dairy-free butter-500g of icing sugar-20g of cocoa powder-Dairy-free milk (if needed)Extras-1 chocolate cupcake-Black fondant-White fondant-50g of dark chocolate-Edible gold paint…To make the cakesStep 1- Preheat your oven to 180 degrees c and line three 6 inch cake tins with grease-proof paper.Step 2- In a bowl, combine the dairy-free milk with the apple cider vinegar and whisk until fully combined.Set aside for 10 minutes to curdle. This creates a vegan ‘buttermilk’.Step 3- In a large mixing bowl, sift the flour, sugar, baking powder and bicarbonate of soda. Mix well to combine.Step 4- Add the melted coconut oil into the ‘buttermilk’ and whisk to combine. Step 5- Whisk in the pink food gel.Step 6- Add the wet ingredients into the dry ingredients and mix.Step 7- Pour equal amounts of batter into the lined cake tins.Make sure to tap the tins on the worktop to remove any air bubbles.Step 8- Pop the cakes into the center of the preheated oven and bake for around 28-30 minutes. You will know they are baked when you put a knife or skewer in and it comes out clean and they are springy to the touch.Step 9- Place the cakes on a cooling rack and allow to cool fully.Once cool, pop them into a sealed container to keep them fresh before frosting.To make the buttercreamStep 1- In a bowl/stand mixer, cream the butter on high then add in the icing sugar and cocoa powder.Whip together until combined, light and fluffy.Add a splash of dairy-free milk if too thick.Step 2- Stack and fill the cakes with the chocolate buttercream.Step 3- I added a chocolate cupcake to the top of the cake and covered it in buttercream. This creates the 3d head for the bear.If you don’t want to make chocolate cupcakes, you can make an extra batch of buttercream and pile it on top of the cake to resemble the bear head.Step 4- Crumb coat the whole cake with the chocolate buttercream and pop into the fridge to set. This will take around 1 hour.Step 5- Add a thick layer of buttercream all over the cake and using a smooth or textured cake scraper or large spatula, smooth out the buttercream.Step 6- Place the chocolate buttercream into a piping bag fitted with a large round tip nozzle and pipe the arms, feet and two balls for the ears (as seen in the photos).Step 7- Grate dark chocolate and press into the buttercream.This adds texture for the bear (optional).Step 8- Roll out one large and two small balls of black fondant and attached to the cake for the eyes and nose.Step 9- Mold white fondant into a heart shape, attached onto the front of the cake with buttercream and paint with edible gold.Whilst the gold was wet, I added on some mini sprinkles (optional).Serve fresh or store in a sealed container in the fridge, the buttercream will firm up at room temperature. Best eaten within a few days!PIN MEMake sure you follow me on my social mediaMy Instagram- https://www.instagram.com/thelittleblogofvegan/Facebook- https://www.facebook.com/littleblogofvegan/Twitter- https://twitter.com/BlogofVeganI would love to see your take on my recipes. Tag me on social media using the hashtag #Blogofvegan #thelittleblogofvegan All of my social media links are in the side bar…come and say hi!Share and follow me for more yummy posts to come!